This chapter inlines all the API documentation into a single long chapter, suitable for printing or reading on a tablet.
(Top)
1 Terminology
2 Writing a Lint Check: Basics
2.1 Preliminaries
2.1.1 “Lint?”
2.1.2 API Stability
2.1.3 Kotlin
2.2 Concepts
2.3 Client API versus Detector API
2.4 Creating an Issue
2.5 TextFormat
2.6 Issue Implementation
2.7 Scopes
2.8 Registering the Issue
2.9 Implementing a Detector: Scanners
2.10 Detector Lifecycle
2.11 Scanner Order
2.12 Implementing a Detector: Services
2.13 Scanner Example
2.14 Analyzing Kotlin and Java Code
2.14.1 UAST
2.14.2 UAST Example
2.14.3 Looking up UAST
2.14.4 Resolving
2.14.5 PSI
2.15 Testing
3 Example: Sample Lint Check GitHub Project
3.1 Project Layout
3.2 :checks
3.3 lintVersion?
3.4 :library and :app
3.5 Lint Check Project Layout
3.6 Service Registration
3.7 IssueRegistry
3.8 Detector
3.9 Detector Test
4 Publishing a Lint Check
4.1 Android
4.1.1 AAR Support
4.1.2 lintPublish Configuration
4.1.3 Local Checks
5 Lint Check Unit Testing
5.1 Creating a Unit Test
5.2 Computing the Expected Output
5.3 Test Files
5.4 Trimming indents?
5.5 Dollars in Raw Strings
5.6 Quickfixes
5.7 Library Dependencies and Stubs
5.8 Binary and Compiled Source Files
6 Adding Quick Fixes
6.1 Introduction
6.2 The LintFix builder class
6.3 Creating a LintFix
6.4 Available Fixes
6.5 Combining Fixes
6.6 Refactoring Java and Kotlin code
6.7 Regular Expressions and Back References
6.8 Emitting quick fix XML to apply on CI
7 Partial Analysis
7.1 About
7.2 The Problem
7.3 Overview
7.4 Does my Detector Need Work?
7.4.1 Catching Mistakes: Blocking Access to Main Project
7.4.2 Catching Mistakes: Simulated App Module
7.4.3 Catching Mistakes: Diffing Results
7.4.4 Catching Mistakes: Remaining Issues
7.5 Incidents
7.6 Constraints
7.7 Incident LintMaps
7.8 Module LintMaps
7.9 Optimizations
8 Frequently Asked Questions
8.0.1 My detector callbacks aren't invoked
8.0.2 My lint check works from the unit test but not in the IDE
8.0.3 visitAnnotationUsage isn't called for annotations
8.0.4 How do I check if a UAST or PSI element is for Java or Kotlin?
8.0.5 What if I need a PsiElement and I have a UElement ?
8.0.6 How do I get the UMethod for a PsiMethod ?
8.0.7 How do get a JavaEvaluator ?
8.0.8 How do I check whether an element is internal?
8.0.9 Is element inline, sealed, operator, infix, suspend, data?
8.0.10 How do I look up a class if I have its fully qualified name?
8.0.11 How do I look up a class if I have a PsiType?
8.0.12 How do I look up hierarhcy annotations for an element?
8.0.13 How do I look up if a class is a subclass of another?
8.0.14 How do I know which parameter a call argument corresponds to?
8.0.15 How can my lint checks target two different versions of lint?
8.0.16 How do I check out the current lint source code?
8.0.17 Where do I find examples of lint checks?
9 Appendix: Recent Changes
10 Appendix: Environment Variables and System Properties
10.1 Environment Variables
10.1.1 Detector Configuration Variables
10.1.2 Lint Configuration Variables
10.1.3 Lint Development Variables
10.2 System Properties
You don't need to read this up front and understand everything, but this is hopefully a handy reference to return to.
In alphabetical order:
A configuration provides extra information or parameters to lint on a
per project, or even per directory basis. For example, the lint.xml
files can change the severity for issues, or list incidents to ignore
(matched for example by a regular expression), or even provide values
for options read by a specific detector.
An object passed into detectors in many APIs, providing data about (for example) which file is being analyzed (and in which project), and for specific types of analysis additional information; for example, an XmlContext points to the DOM document, a JavaContext includes the AST, and so on.
The implementation of the lint check which registers Issues, analyzes the code, and reports Incidents.
An Implementation tells lint how a given issue is actually
analyzed, such as which detector class to instantiate, as well as
which scopes the detector applies to.
A specific occurrence of the issue at a specific location. An example of an incident is:
    Warning: In file IoUtils.kt, line 140, the field download folder
is "/sdcard/downloads"; do not hardcode the path to `/sdcard`.A type or class of problem that your lint check identifies. An issue has an associated severity (error, warning or info), a priority, a category, an explanation, and so on.
An example of an issue is “Don't hardcode paths to /sdcard”.
An IssueRegistry provides a list of issues to lint. When you write
one or more lint checks, you'll register these in an IssueRegistry
and point to it using the META-INF service loader mechanism.
The LintClient represents the specific tool the detector is running
in. For example, when running in the IDE there is a LintClient which
(when incidents are reported) will show highlights in the editor,
whereas when lint is running as part of the Gradle plugin, incidents
are instead accumulated into HTML (and XML and text) reports, and
the build interrupted on error.
A “location” refers to a place where an incident is reported.
Typically this refers to a text range within a source file, but a
location can also point to a binary file such as a png file.
Locations can also be linked together, along with descriptions.
Therefore, if you for example are reporting a duplicate declaration,
you can include both Locations, and in the IDE, both locations
(if they're in the same file) will be highlighted. A location linked
from another is called a “secondary” location, but the chaining can
be as long as you want (and lint's unit testing infrastructure will
make sure there are no cycles.)
A “map reduce” architecture in lint which makes it possible to analyze individual modules in isolation and then later filter and customize the partial results based on conditions outside of these modules. This is explained in greater detail in the partial analysis chapter.
The Platform abstraction allows lint issues to indicate where they
apply (such as “Android”, or “Server”, and so on). This means that an
Android-specific check won't trigger warnings on non-Android code.
Scope is an enum which lists various types of files that a detector
may want to analyze.
For example, there is a scope for XML files, there is a scope for Java and Kotlin files, there is a scope for .class files, and so on.
Typically lint cares about which set of scopes apply,
so most of the APIs take an EnumSet< Scope>, but we'll often
refer to this as just “the scope” instead of the “scope set”.
For an issue, whether the incident should be an error, or just a warning, or neither (just an FYI highlight). There is also a special type of error severity, “fatal”, discussed later.
An enum describing various text formats lint understands. Lint checks will typically only operate with the “raw” format, which is markdown-like (e.g. you can surround words with an asterisk to make it italics or two to make it bold, and so on).
A Vendor is a simple data class which provides information about
the provenance of a lint check: who wrote it, where to file issues,
and so on.
(If you already know a lot of the basics but you're here because you've run into a problem and you're consulting the docs, take a look at the frequently asked questions chapter.)
The lint tool shipped with the C compiler and provided additional
static analysis of C code beyond what the compiler checked.
Android Lint was named in honor of this tool, and with the Android prefix to make it really clear that this is a static analysis tool intended for analysis of Android code, provided by the Android Open Source Project — and to disambiguate it from the many other tools with “lint“ in their names.
However, since then, Android Lint has broadened its support and is no longer intended only for Android code. In fact, within Google, it is used to analyze all Java and Kotlin code. One of the reasons for this is that it can easily analyze both Java and Kotlin code without having to implement the checks twice. Additional features are described in the features chapter.
We're planning to rename lint to reflect this new role, so we are looking for good name suggestions.
Lint's APIs are still marked as @Beta, and we have made it very clear all along that this is not a stable API, so custom lint checks may need to be updated periodically to keep working.
However, ”some APIs are more stable than others“. In particular, the detector API (described below) is much less likely to change than the client API (which is not intended for lint check authors but for tools integrating lint to run within, such as IDEs and build systems).
However, this doesn't mean the detector API won't change. A large part of the API surface is external to lint; it's the AST libraries (PSI and UAST) for Java and Kotlin from JetBrains; it's the bytecode library (asm.ow2.io), it's the XML DOM library (org.w3c.dom), and so on. Lint intentionally stays up to date with these, so any API or behavior changes in these can affect your lint checks.
Lint's own APIs may also change. The current API has grown organically over the last 10 years (the first version of lint was released in 2011) and there are a number of things we'd clean up and do differently if starting over. Not to mention rename and clean up inconsistencies.
However, lint has been pretty widely adopted, so at this point creating a nicer API would probably cause more harm than good, so we're limiting recent changes to just the necessary ones. An example of this is the new partial analysis architecture in 7.0 which is there to allow much better CI and incremental analysis performance.
We recommend that you implement your checks in Kotlin. Part of the reason for that is that the lint API uses a number of Kotlin features:
Issue.create() have a lot of parameters
with default parameters. The API is cleaner to use if you just
specify what you need and rely on defaults for everything else.
LintUtils class).
@Deprecated annotation on
lines 1 through 7 will be added in an upcoming release, to ease
migration to a new API. IntelliJ can automatically quickfix these
deprecation replacements.@Deprecated(
"Use the new report(Incident) method instead, which is more future proof",
ReplaceWith(
"report(Incident(issue, message, location, null, quickfixData))",
"com.android.tools.lint.detector.api.Incident"
)
)
@JvmOverloads
open fun report(
issue: Issue,
location: Location,
message: String,
quickfixData: LintFix? = null
) {
// ...
}As of 7.0, there is more Kotlin code in lint than remaining Java code:
| Language | files | blank | comment | code |
|---|---|---|---|---|
| Kotlin | 420 | 14243 | 23239 | 130250 |
| Java | 289 | 8683 | 15205 | 101549 |
$ cloc lint/
And that's for all of lint, including many old lint detectors which
haven't been touched in years. In the Lint API library,
lint/libs/lint-api, the code is 78% Kotlin and 22% Java.
Lint will search your source code for problems. There are many types of
problems, and each one is called an Issue, which has associated
metadata like a unique id, a category, an explanation, and so on.
Each instance that it finds is called an ”incident“.
The actual responsibility of searching for and reporting incidents is
handled by detectors — subclasses of Detector. Your lint check will
extend Detector, and when it has found a problem, it will ”report“
the incident to lint.
A Detector can analyze more than one Issue. For example, the
built-in StringFormatDetector analyzes formatting strings passed to
String.format() calls, and in the process of doing that discovers
multiple unrelated issues — invalid formatting strings, formatting
strings which should probably use the plurals API instead, mismatched
types, and so on. The detector could simply have a single issue called
“StringFormatProblems” and report everything as a StringFormatProblem,
but that's not a good idea. Each of these individual types of String
format problems should have their own explanation, their own category,
their own severity, and most importantly should be individually
configurable by the user such that they can disable or promote one of
these issues separately from the others.
A Detector can indicate which sets of files it cares about. These are
called “scopes”, and the way this works is that when you register your
Issue, you tell that issue which Detector class is responsible for
analyzing it, as well as which scopes the detector cares about.
If for example a lint check wants to analyze Kotlin files, it can
include the Scope.JAVA_FILE scope, and now that detector will be
included when lint processes Java or Kotin files.
Scope.JAVA_FILE may make it sound like there should also
be a Scope.KOTLIN_FILE. However, JAVA_FILE here really refers to
both Java and Kotlin files since the analysis and APIs are identical
for both (using “UAST”, a universal abstract syntax tree). However,
at this point we don't want to rename it since it would break a lot
of existing checks. We might introduce an alias and deprecate this
one in the future.When detectors implement various callbacks, they can analyze the code, and if they find a problematic pattern, they can “report” the incident. This means computing an error message, as well as a “location”. A “location” for an incident is really an error range — a file, and a starting offset and an ending offset. Locations can also be linked together, so for example for a “duplicate declaration” error, you can and should include both locations.
Many detector methods will pass in a Context, or a more specific
subclass of Context such as JavaContext or XmlContext. This
allows lint to provide access to the detectors information they may
need, without passing in a lot of parameters (and allowing lint to add
additional data over time without breaking signatures).
The Context classes also provide many convenience APIs. For example,
for XmlContext there are methods for creating locations for XML tags,
XML attributes, just the name part of an XML attribute and just the
value part of an XML attribute. For a JavaContext there are also
methods for creating locations, such as for a method call, including
whether to include the receiver and/or the argument list.
When you report an Incident you can also provide a LintFix; this is
a quickfix which the IDE can use to offer actions to take on the
warning. In some cases, you can offer a complete and correct fix (such
as removing an unused element). In other cases the fix may be less
clear; for example, the AccessibilityDetector asks you to set a
description for images; the quickfix will set the content attribute,
but will leave the text value as TODO and will select the string such
that the user can just type to replace it.
$name has already been declared”. This isn't just for cosmetics;
it also makes lint's baseline
mechanism work better since it
currently matches by id + file + message, not by line numbers which
typically drift over time.Lint's API has two halves:
The class in the Client API which represents lint running in a tool is
called LintClient. This class is responsible for, among other things:
LintClient in the IDE
will implement the readFile method to first look in the open source
editors and if the requested file is being edited, it will return the
current (often unsaved!) contents.
LintClient provides a simple way to provide exact responses for
specific URLs:lint()
.files(...)
// Set up exactly the expected maven.google.com network output to
// ensure stable version suggestions in the tests
.networkData("https://maven.google.com/master-index.xml", ""
+ "<!--?xml version='1.0' encoding='UTF-8'?-->\n"
+ "<metadata>\n"
+ " <com.android.tools.build>"
+ "</com.android.tools.build></metadata>")
.networkData("https://maven.google.com/com/android/tools/build/group-index.xml", ""
+ "<!--?xml version='1.0' encoding='UTF-8'?-->\n"
+ "<com.android.tools.build>\n"
+ " <gradle versions="\"2.3.3,3.0.0-alpha1\"/">\n"
+ "</gradle></com.android.tools.build>")
.run()
.expect(...)
And much, much, more. However, most of the implementation of
LintClient is intended for integration of lint itself, and as a check
author you don't need to worry about it. It's the detector API that
matters, and is also less likely to change than the client API.
Also,
public such that lint's
code in one package can access it from the other. There's normally a
comment explaining that this is for internal use only, but be aware
that just because something is public or not final it's a good
idea to call or override it.For information on how to set up the project and to actually publish your lint checks, see the sample and publishing chapters.
Issue is a final class, so unlike Detector, you don't subclass
it, you instantiate it via Issue.create.
By convention, issues are registered inside the companion object of the corresponding detector, but that is not required.
Here's an example:
class SdCardDetector : Detector(), SourceCodeScanner {
    companion object Issues {
        @JvmField
        val ISSUE = Issue.create(
            id = "SdCardPath",
            briefDescription = "Hardcoded reference to `/sdcard`",
            explanation = """
                Your code should not reference the `/sdcard` path directly; \
                instead use `Environment.getExternalStorageDirectory().getPath()`.

                Similarly, do not reference the `/data/data/` path directly; it \
                can vary in multi-user scenarios. Instead, use \
                `Context.getFilesDir().getPath()`.
                """,
            moreInfo = "https://developer.android.com/training/data-storage#filesExternal",
            category = Category.CORRECTNESS,
            severity = Severity.WARNING,
            androidSpecific = true,
            implementation = Implementation(
                SdCardDetector::class.java,
                Scope.JAVA_FILE_SCOPE
            )
        )
    }
    ...
There are a number of things to note here.
On line 4, we have the Issue.create() call. We store the issue into a
property such that we can reference this issue both from the
IssueRegistry, where we provide the Issue to lint, and also in the
Detector code where we report incidents of the issue.
Note that Issue.create is a method with a lot of parameters (and we
will probably add more parameters in the future). Therefore, it's a
good practice to explicitly include the argument names (and therefore
to implement your code in Kotlin).
The Issue provides metadata about a type of problem.
The id is a short, unique identifier for this issue. By
convention it is a combination of words, capitalized camel case (though
you can also add your own package prefix as in Java packages). Note
that the id is “user visible”; it is included in text output when lint
runs in the build system, such as this:
src/main/kotlin/test/pkg/MyTest.kt:4: Warning: Do not hardcode "/sdcard/";
      use Environment.getExternalStorageDirectory().getPath() instead [SdCardPath]
    val s: String = "/sdcard/mydir"
                     ~~~~~~~~~~~~~
0 errors, 1 warnings
(Notice the [SdCardPath] suffix at the end of the error message.)
The reason the id is made known to the user is that the ID is how they'll configure and/or suppress issues. For example, to suppress the warning in the current method, use
@Suppress("SdCardPath")(or in Java, @SuppressWarnings). Note that there is an IDE quickfix to suppress an incident which will automatically add these annotations, so you don't need to know the ID in order to be able to suppress an incident, but the ID will be visible in the annotation that it generates, so it should be reasonably specific.
Also, since the namespace is global, try to avoid picking generic names that could clash with others, or seem to cover a larger set of issues than intended. For example, “InvalidDeclaration” would be a poor id since that can cover a lot of potential problems with declarations across a number of languages and technologies.
Next, we have the briefDescription. You can think of this as a
“category report header“; this is a static description for all
incidents of this type, so it cannot include any specifics. This string
is used for example as a header in HTML reports for all incidents of
this type, and in the IDE, if you open the Inspections UI, the various
issues are listed there using the brief descriptions.
The explanation is a multi line, ideally multi-paragraph
explanation of what the problem is. In some cases, the problem is self
evident, as in the case of ”Unused declaration“, but in many cases, the
issue is more subtle and might require additional explanation,
particularly for what the developer should do to address the
problem. The explanation is included both in HTML reports and in the
IDE inspection results window.
Note that even though we're using a raw string, and even though the
string is indented to be flush with the rest of the issue registration
for better readability, we don't need to call trimIndent() on
the raw string. Lint does that automatically.
However, we do need to add line continuations — those are the trailing \'s at the end of the lines.
Note also that we have a Markdown-like simple syntax, described in the “TextFormat” section below. You can use asterisks for italics or double asterisks for bold, you can use apostrophes for code font, and so on. In terminal output this doesn't make a difference, but the IDE, explanations, incident error messages, etc, are all formatted using these styles.
The category isn't super important; the main use is that category
names can be treated as id's when it comes to issue configuration; for
example, a user can turn off all internationalization issues, or run
lint against only the security related issues. The category is also
used for locating related issues in HTML reports. If none of the
built-in categories are appropriate you can also create your own.
The severity property is very important. An issue can be either a
warning or an error. These are treated differently in the IDE (where
errors are red underlines and warnings are yellow highlights), and in
the build system (where errors can optionally break the build and
warnings do not). There are some other severities too; ”fatal“ is like
error except these checks are designated important enough (and have
very few false positives) such that we run them during release builds,
even if the user hasn't explicitly run a lint target. There's also
“informational” severity, which is only used in one or two places, and
finally the “ignore” severity. This is never the severity you register
for an issue, but it's part of the severities a developer can configure
for a particular issue, thereby turning off that particular check.
You can also specify a moreInfo URL which will be included in the
issue explanation as a “More Info” link to open to read more details
about this issue or underlying problem.
All error messages and issue metadata strings in lint are interpreted using simple Markdown-like syntax:
| Raw text format | Renders To |
|---|---|
| This is a `code symbol` | This is a code symbol |
This is *italics* | This is italics |
This is **bold** | This is bold |
| http://, https:// | http://, https:// |
\*not italics* | \*not italics* |
| ```language\n text\n``` | (preformatted text block) |
This is useful when error messages and issue explanations are shown in HTML reports generated by Lint, or in the IDE, where for example the error message tooltips will use formatting.
In the API, there is a TextFormat enum which encapsulates the
different text formats, and the above syntax is referred to as
TextFormat.RAW; it can be converted to .TEXT or .HTML for
example, which lint does when writing text reports to the console or
HTML reports to files respectively. As a lint check author you don't
need to know this (though you can for example with the unit testing
support decide which format you want to compare against in your
expected output), but the main point here is that your issue's brief
description, issue explanation, incident report messages etc, should
use the above “raw” syntax. Especially the first conversion; error
messages often refer to class names and method names, and these should
be surrounded by apostrophes.
The last issue registration property is the implementation. This
is where we glue our metadata to our specific implementation of an
analyzer which can find instances of this issue.
Normally, the Implementation provides two things:
.class for our Detector which should be instantiated. In the
code sample above it was SdCardDetector.
Scope that this issue's detector applies to. In the above
example it was Scope.JAVA_FILE, which means it will apply to Java
and Kotlin files.
The Implementation actually takes a set of scopes; we still refer
to this as a “scope”. Some lint checks want to analyze multiple types
of files. For example, the StringFormatDetector will analyze both the
resource files declaring the formatting strings across various locales,
as well as the Java and Kotlin files containing String.format calls
referencing the formatting strings.
There are a number of pre-defined sets of scopes in the Scope
class. Scope.JAVA_FILE_SCOPE is the most common, which is a
singleton set containing exactly Scope.JAVA_FILE, but you
can always create your own, such as for example
EnumSet.of(Scope.CLASS_FILE, Scope.JAVA_LIBRARIES)When a lint issue requires multiple scopes, that means lint will only run this detector if all the scopes are available in the running tool. When lint runs a full batch run (such as a Gradle lint target or a full “Inspect Code“ in the IDE), all scopes are available.
However, when lint runs on the fly in the editor, it only has access to the current file; it won't re-analyze all files in the project for every few keystrokes. So in this case, the scope in the lint driver only includes the current source file's type, and only lint checks which specify a scope that is a subset would run.
This is a common mistake for new lint check authors: the lint check works just fine as a unit test, but they don't see working in the IDE because the issue implementation requests multiple scopes, and all have to be available.
Often, a lint check looks at multiple source file types to work
correctly in all cases, but it can still identify some problems given
individual source files. In this case, the Implementation constructor
(which takes a vararg of scope sets) can be handed additional sets of
scopes, called ”analysis scopes“. If the current lint client's scope
matches or is a subset of any of the analysis scopes, then the check
will run after all.
Once you've created your issue, you need to provide it from
an IssueRegistry.
Here's an example IssueRegistry:
package com.example.lint.checks

import com.android.tools.lint.client.api.IssueRegistry
import com.android.tools.lint.client.api.Vendor
import com.android.tools.lint.detector.api.CURRENT_API

class SampleIssueRegistry : IssueRegistry() {
    override val issues = listOf(SdCardDetector.ISSUE)

    override val api: Int
        get() = CURRENT_API

    // works with Studio 4.1 or later; see
    // com.android.tools.lint.detector.api.Api / ApiKt
    override val minApi: Int
        get() = 8

    // Requires lint API 30.0+; if you're still building for something
    // older, just remove this property.
    override val vendor: Vendor = Vendor(
        vendorName = "Android Open Source Project",
        feedbackUrl = "https://com.example.lint.blah.blah",
        contact = "author@com.example.lint"
    )
}
On line 8, we're returning our issue. It's a list, so an
IssueRegistry can provide multiple issues.
The api property should be written exactly like the way it
appears above in your own issue registry as well; this will record
which version of the lint API this issue registry was compiled against
(because this references a static final constant which will be copied
into the jar file instead of looked up dynamically when the jar is
loaded).
The minApi property records the oldest lint API level this check
has been tested with.
Both of these are used at issue loading time to make sure lint checks are compatible, but in recent versions of lint (7.0) lint will more aggressively try to load older detectors even if they have been compiled against older APIs since there's a high likelihood that they will work (it checks all the lint APIs in the bytecode and uses reflection to verify that they're still there).
The vendor property is new as of 7.0, and gives lint authors a
way to indicate where the lint check came from. When users use lint,
they're running hundreds and hundreds of checks, and sometimes it's not
clear who to contact with requests or bug reports. When a vendor has
been specified, lint will include this information in error output and
reports.
The last step towards making the lint check available is to make
the IssueRegistry known via the service loader mechanism.
Create a file named exactly
src/main/resources/META-INF/services/com.android.tools.lint.client.api.IssueRegistrywith the following contents (but where you substitute in your own fully qualified class name for your issue registry):
com.example.lint.checks.SampleIssueRegistry
If you're not building your lint check using Gradle, you may not want
the src/main/resources prefix; the point is that your packaging of
the jar file should contain META-INF/services/ at the root of the jar
file.
We've finally come to the main task with writing a lint check:
implementing the Detector.
Here's a trivial one:
class MyDetector : Detector() {
   override fun run(context: Context) {
       context.report(ISSUE, Location.create(context.file),
           "I complain a lot")
   }
}
This will just complain in every single file. Obviously, no real lint detector does this; we want to do some analysis and conditionally report incidents.
In order to make it simpler to perform analysis, Lint has dedicated support for analyzing various file types. The way this works is that you register interest, and then various callbacks will be invoked.
For example:
XmlScanner, in an XML element you can be
called back
visitElement)
visitAttribute)
visitDocument
SourceCodeScanner, in Kotlin and Java files
you can be called back
getApplicableMethodNames
and visitMethodCall)
getApplicableConstructorTypes and visitConstructor)
applicableSuperClasses and
visitClass)
applicableAnnotations and visitAnnotationUsage)
getApplicableUastTypes
and createUastHandler)
ClassScanner, in .class and .jar files
you can be called back
getApplicableCallOwners and checkCall
getApplicableAsmNodeTypes and checkInstruction)
visitDocument, you can perform your own
ASM bytecode iteration via checkClass.
GradleScanner
which lets you visit build.gradle and build.gradle.kts DSL
closures, BinaryFileScanner which visits resource files such as
webp and png files, and OtherFileScanner which lets you visit
unknown files.
Detector already implements empty stub methods for all
of these interfaces, so if you for example implement
SourceFileScanner in your detector, you don't need to go and add
empty implementations for all the methods you aren't using.
super when you override
methods; methods meant to be overridden are always empty so the
super-call is superfluous.Detector registration is done by detector class, not by detector instance. Lint will instantiate detectors on your behalf. It will instantiate the detector once per analysis, so you can stash state on the detector in fields and accumulate information for analysis at the end.
There are some callbacks both before each individual file is analyzed
(beforeCheckFile and afterCheckFile), as well as before and after
analysis of all the modules (beforeCheckRootProject and
afterCheckRootProject).
This is for example how the ”unused resources“ check works: we store
all the resource declarations and resource references we find in the
project as we process each file, and then in the
afterCheckRootProject method we analyze the resource graph and
compute any resource declarations that are not reachable in the
reference graph, and then we report each of these as unused.
Some lint checks involve multiple scanners. This is pretty common in
Android, where we want to cross check consistency between data in
resource files with the code usages. For example, the String.format
check makes sure that the arguments passed to String.format match the
formatting strings specified in all the translation XML files.
Lint defines an exact order in which it processes scanners, and within
scanners, data. This makes it possible to write some detectors more
easily because you know that you'll encounter one type of data before
the other; you don't have to handle the opposite order. For example, in
our String.format example, we know that we'll always see the
formatting strings before we see the code with String.format calls,
so we can stash the formatting strings in a map, and when we process
the formatting calls in code, we can immediately issue reports; we
don't have to worry about encountering a formatting call for a
formatting string we haven't processed yet.
Here's lint's defined order:
.class files and library .jar files)
Similarly, lint will always process libraries before the modules that depend on them.
context.driver.requestRepeat(this, …). This is actually how the
unused resource analysis works. Note however that this repeat is
only valid within the current module; you can't re-run the analysis
through the whole dependency graph.In addition to the scanners, lint provides a number of services to make implementation simpler. These include
ConstantEvaluator: Performs evaluation of AST expressions, so
for example if we have the statements x = 5; y = 2 * x, the
constant evaluator can tell you that y is 10. This constant evaluator
can also be more permissive than a compiler's strict constant
evaluator; e.g. it can return concatenated strings where not all
parts are known, or it can use non-final initial values of fields.
This can help you find possible bugs instead of certain bugs.
TypeEvaluator: Attempts to provide the concrete type of an
expression. For example, for the Java statements Object s = new
StringBuilder(); Object o = s, the type evaluator can tell you that
the type of o at this point is really StringBuilder.
JavaEvaluator: Despite the unfortunate older name, this service
applies to both Kotlin and Java, and can for example provide
information about inheritance hierarchies, class lookup from fully
qualified names, etc.
DataFlowAnalyzer: Data flow analysis within a method.
ResourceRepository and the ResourceEvaluator.
editDistance method used to find likely typos used by a number
of checks.
Let's create a Detector using one of the above scanners,
XmlScanner, which will look at all the XML files in the project and
if it encounters a <bitmap> tag it will report that <vector> should
be used instead:
import com.android.tools.lint.detector.api.Detector
import com.android.tools.lint.detector.api.Detector.XmlScanner
import com.android.tools.lint.detector.api.Location
import com.android.tools.lint.detector.api.XmlContext
import org.w3c.dom.Element

class MyDetector : Detector(), XmlScanner {
    override fun getApplicableElements() = listOf("bitmap")

    override fun visitElement(context: XmlContext, element: Element) {
        val incident = Incident(context, ISSUE)
            .message( "Use `<vector>` instead of `<bitmap>`")
            .at(element)
        context.report(incident))
    }
}
The above is using the new Incident API from Lint 7.0 and on; in
older versions you can use the following API, which still works in 7.0:
class MyDetector : Detector(), XmlScanner {
    override fun getApplicableElements() = listOf("bitmap")

    override fun visitElement(context: XmlContext, element: Element) {
        context.report(ISSUE, context.getLocation(element),
            "Use `<vector>` instead of `<bitmap>`")
    }
}
The second, older form, may seem simpler, but the new API allows a lot more metadata to be attached to the report, such as an override severity. You don't have to convert to the builder syntax to do this; you could also have written the second form as
context.report(Incident(ISSUE, context.getLocation(element),
"Use `<vector>` instead of `<bitmap>`"))To analyze Kotlin and Java code, lint offers an abstract syntax tree, or ”AST“, for the code.
This AST is called ”UAST“, for ”Universal Abstract Syntax Tree“, which
represents multiple languages in the same way, hiding the language
specific details like whether there is a semicolon at the end of the
statements or whether the way an annotation class is declared is as
@interface or annotation class, and so on.
This makes it possible to write a single analyzer which works (”universally“) across all languages supported by UAST. And this is very useful; most lint checks are doing something API or data-flow specific, not something language specific. If however you do need to implement something very language specific, see the next section, “PSI”.
In UAST, each element is called a UElement, and there are a
number of subclasses — UFile for the compilation unit, UClass for
a class, UMethod for a method, UExpression for an expression,
UIfExpression for an if-expression, and so on.
Here's a visualization of an AST in UAST for two equivalent programs
written in Kotlin and Java. These programs both result in the same
AST, shown on the right: a UFile compilation unit, containing
a UClass named MyTest, containing UField named s which has
an initializer setting the initial value to hello.
UProperty node
which represents Kotlin properties. Instead, the AST will look the
same as if the property had been implemented in Java: it will
contain a private field and a public getter and a public setter
(unless of course the Kotlin property specifies a private setter).
If you’ve written code in Kotlin and have tried to access that
Kotlin code from a Java file you will see the same thing — the
“Java view” of Kotlin. The next section, “PSI“, will discuss how to
do more language specific analysis.
Here's an example (from the built-in AlarmDetector for Android) which
shows all of the above in practice; this is a lint check which makes
sure that if anyone calls AlarmManager.setRepeating, the second
argument is at least 5,000 and the third argument is at least 60,000.
Line 1 says we want to have line 3 called whenever lint comes across a
method to setRepeating.
On lines 8-4 we make sure we're talking about the correct method on the
correct class with the correct signature. This uses the JavaEvaluator
to check that the called method is a member of the named class. This is
necessary because the callback would also be invoked if lint came
across a method call like Unrelated.setRepeating; the
visitMethodCall callback only matches by name, not receiver.
On line 36 we use the ConstantEvaluator to compute the value of each
argument passed in. This will let this lint check not only handle cases
where you're specifying a specific value directly in the argument list,
but also for example referencing a constant from elsewhere.
override fun getApplicableMethodNames(): List<string> = listOf("setRepeating")

override fun visitMethodCall(
    context: JavaContext,
    node: UCallExpression,
    method: PsiMethod
) {
    val evaluator = context.evaluator
    if (evaluator.isMemberInClass(method, "android.app.AlarmManager") &&
        evaluator.getParameterCount(method) == 4
    ) {
        ensureAtLeast(context, node, 1, 5000L)
        ensureAtLeast(context, node, 2, 60000L)
    }
}

private fun ensureAtLeast(
    context: JavaContext,
    node: UCallExpression,
    parameter: Int,
    min: Long
) {
    val argument = node.valueArguments[parameter]
    val value = getLongValue(context, argument)
    if (value < min) {
        val message = "Value will be forced up to $min as of Android 5.1; " +
            "don't rely on this to be exact"
        context.report(ISSUE, argument, context.getLocation(argument), message)
    }
}

private fun getLongValue(
    context: JavaContext,
    argument: UExpression
): Long {
    val value = ConstantEvaluator.evaluate(context, argument)
    if (value is Number) {
        return value.toLong()
    }

    return java.lang.Long.MAX_VALUE
}
To write your detector's analysis, you need to know what the AST for
your code of interest looks like. Instead of trying to figure it out by
examining the elements under a debugger, a simple way to find out is to
”pretty print“ it, using the UElement extension method
asRecursiveLogString.
For example, given the following unit test:
lint().files(
       kotlin(""
               + "package test.pkg\n"
               + "\n"
               + "class MyTest {\n"
               + "    val s: String = \"hello\"\n"
               + "}\n"), ...
If you evaluate context.uastFile?.asRecursiveLogString() from
one of the callbacks, it will print this:
UFile (package = test.pkg)
    UClass (name = MyTest)
        UField (name = s)
            UAnnotation (fqName = org.jetbrains.annotations.NotNull)
            ULiteralExpression (value = "hello")
        UAnnotationMethod (name = getS)
        UAnnotationMethod (name = MyTest)
(This also illustrates the earlier point about UAST representing the
Java view of the code; here the read-only public Kotlin property ”s“ is
represented by both a private field s and a public getter method,
getS().)
When you have a method call, or a field reference, you may want to take
a look at the called method or field. This is called ”resolving“, and
UAST supports it directly; on a UCallExpression for example, call
.resolve(), which returns a PsiMethod, which is like a UMethod,
but may not represent a method we have source for (which for example
would be the case if you resolve a reference to the JDK or to a library
we do not have sources for). You can call .toUElement() on the
PSI element to try to convert it to UAST if source is available.
PSI is short for ”Program Structure Interface“, and is IntelliJ's AST abstraction used for all language modeling in the IDE.
Note that there is a different PSI representation for each language. Java and Kotlin have completely different PSI classes involved. This means that writing a lint check using PSI would involve writing a lot of logic twice; once for Java, and once for Kotlin. (And the Kotlin PSI is a bit trickier to work with.)
That's what UAST is for: there's a ”bridge“ from the Java PSI to UAST and there's a bridge from the Kotlin PSI to UAST, and your lint check just analyzes UAST.
However, there are a few scenarios where we have to use PSI.
The first, and most common one, is listed in the previous section on
resolving. UAST does not completely replace PSI; in fact, PSI leaks
through in part of the UAST API surface. For example,
UMethod.resolve() returns a PsiMethod. And more importantly,
UMethod extends PsiMethod.
PsiMethod and other PSI classes contain
some unfortunate APIs that only work for Java, such as asking for
the method body. Because UMethod extends PsiMethod, you might be
tempted to call getBody() on it, but this will return null from
Kotlin. If your unit tests for your lint check only have test cases
written in Java, you may not realize that your check is doing the
wrong thing and won't work on Kotlin code. It should call uastBody
on the UMethod instead. Lint's special detector for lint detectors
looks for this and a few other scenarios (such as calling parent
instead of uastParent), so be sure to configure it for your
project.When you are dealing with ”signatures“ — looking at classes and class inheritance, methods, parameters and so on — using PSI is fine — and unavoidable since UAST does not represent bytecode (though in the future it potentially could, via a decompiler) or any other JVM languages than Kotlin and Java.
However, if you are looking at anything inside a method or class or field initializer, you must use UAST.
The second scenario where you may need to use PSI is where you have to do something language specific which is not represented in UAST. For example, if you are trying to look up the names or default values of a parameter, or whether a given class is a companion object, then you'll need to dip into Kotlin PSI.
There is usually no need to look at Java PSI since UAST fully covers it, unless you want to look at individual details like specific whitespace between AST nodes, which is represented in PSI but not UAST.
Writing unit tests for the lint check is important, and this is covered in detail in the dedicated unit testing chapter.
The https://github.com/googlesamples/android-custom-lint-rules GitHub project provides a sample lint check which shows a working skeleton.
This chapter walks through that sample project and explains what and why.
Here's the project layout of the sample project:
We have an application module, app, which depends (via an
implementation dependency) on a library, and the library itself has
a lintPublish dependency on the checks project.
The checks project is where the actual lint checks are implemented.
This project is a plain Kotlin or plain Java Gradle project:
apply plugin: 'java-library'
apply plugin: 'kotlin'
apply plugin: 'com.android.lint'. This pulls in the
standalone Lint Gradle plugin, which adds a lint target to this
Kotlin project. This means that you can run ./gradlew lint on the
:checks project too. This is useful because lint ships with a
dozen lint checks that look for mistakes in lint detectors! This
includes warnings about using the wrong UAST methods, invalid id
formats, words in messages which look like code which should
probably be surrounded by apostrophes, etc.The Gradle file also declares the dependencies on lint APIs that our detector needs:
dependencies {
    compileOnly "com.android.tools.lint:lint-api:$lintVersion"
    compileOnly "com.android.tools.lint:lint-checks:$lintVersion"
    testImplementation "com.android.tools.lint:lint-tests:$lintVersion"
}
The second dependency is usually not necessary; you just need to depend
on the Lint API. However, the built-in checks define a lot of
additional infrastructure which it's sometimes convenient to depend on,
such as ApiLookup which lets you look up the required API level for a
given method, and so on. Don't add the dependency until you need it.
What is the lintVersion variable defined above?
Here's the top level build.gradle
buildscript {
    ext {
        kotlinVersion = '1.4.31'

        // Current lint target: Studio 4.2 / AGP 7
        //gradlePluginVersion = '4.2.0-beta06'
        //lintVersion = '27.2.0-beta06'

        // Upcoming lint target: Arctic Fox / AGP 7
        gradlePluginVersion = '7.0.0-alpha10'
        lintVersion = '30.0.0-alpha10'
    }

    repositories {
        google()
        mavenCentral()
    }
    dependencies {
        classpath "com.android.tools.build:gradle:$gradlePluginVersion"
        classpath "org.jetbrains.kotlin:kotlin-gradle-plugin:$kotlinVersion"
    }
}
The $lintVersion variable is defined on line 11. We don't technically
need to define the $gradlePluginVersion here or add it to the classpath on line 19, but that's done so that we can add the lint
plugin on the checks themselves, as well as for the other modules,
:app and :library, which do need it.
When you build lint checks, you're compiling against the Lint APIs
distributed on maven.google.com (which is referenced via google() in
Gradle files). These follow the Gradle plugin version numbers.
Therefore, you first pick which of lint's API you'd like to compile against. You should use the latest available if possible.
Once you know the Gradle plugin version number, say 4.2.0-beta06, you can compute the lint version number by simply adding 23 to the major version of the gradle plugin, and leave everything the same:
lintVersion = gradlePluginVersion + 23.0.0
For example, 7 + 23 = 30, so AGP version 7.something corresponds to Lint version 30.something. As another example; as of this writing the current stable version of AGP is 4.1.2, so the corresponding version of the Lint API is 27.1.2.
The library project depends on the lint check project, and will
package the lint checks as part of its payload. The app project
then depends on the library, and has some code which triggers
the lint check. This is there to demonstrate how lint checks can
be published and consumed, and this is described in detail in the
Publishing a Lint Check chapter.
The lint checks source project is very simple
checks/build.gradle
checks/src/main/resources/META-INF/services/com.android.tools.lint.client.api.IssueRegistry
checks/src/main/java/com/example/lint/checks/SampleIssueRegistry.kt
checks/src/main/java/com/example/lint/checks/SampleCodeDetector.kt
checks/src/test/java/com/example/lint/checks/SampleCodeDetectorTest.kt
First is the build file, which we've discussed above.
Then there's the service registration file. Notice how this file is in
the source set src/main/resources/, which means that Gradle will
treat it as a resource and will package it into the output jar, in the
META-INF/services folder. This is using the service-provider loading facility in the JDK to register a service lint can look up. The
key is the fully qualified name for lint's IssueRegistry class.
And the contents of that file is a single line, the fully
qualified name of the issue registry:
$ cat checks/src/main/resources/META-INF/services/com.android.tools.lint.client.api.IssueRegistry
com.example.lint.checks.SampleIssueRegistry
(The service loader mechanism is understood by IntelliJ, so it will correctly update the service file contents if the issue registry is renamed etc.)
The service registration can contain more than one issue registry, though there's usually no good reason for that, since a single issue registry can provide multiple issues.
Next we have the IssueRegistry linked from the service registration.
Lint will instantiate this class and ask it to provide a list of
issues. These are then merged with lint's other issues when lint
performs its analysis.
In its simplest form we'd only need to have the following code in that file:
package com.example.lint.checks
import com.android.tools.lint.client.api.IssueRegistry
class SampleIssueRegistry : IssueRegistry() {
    override val issues = listOf(SampleCodeDetector.ISSUE)
}
However, we're also providing some additional metadata about these lint
checks, such as the Vendor, which contains information about the
author and (optionally) contact address or bug tracker information,
displayed to users when an incident is found.
We also provide some information about which version of lint's API the check was compiled against, and the lowest version of the lint API that this lint check has been tested with. (Note that the API versions are not identical to the versions of lint itself; the idea and hope is that the API may evolve at a slower pace than updates to lint delivering new functionality).
The IssueRegistry references the SampleCodeDetector.ISSUE,
so let's take a look at SampleCodeDetector:
class SampleCodeDetector : Detector(), UastScanner {

    // ...

    companion object {
        /**
         * Issue describing the problem and pointing to the detector
         * implementation.
         */
        @JvmField
        val ISSUE: Issue = Issue.create(
            // ID: used in @SuppressLint warnings etc
            id = "ShortUniqueId",
            // Title -- shown in the IDE's preference dialog, as category headers in the
            // Analysis results window, etc
            briefDescription = "Lint Mentions",
            // Full explanation of the issue; you can use some markdown markup such as
            // `monospace`, *italic*, and **bold**.
            explanation = """
                    This check highlights string literals in code which mentions the word `lint`. \
                    Blah blah blah.

                    Another paragraph here.
                    """,
            category = Category.CORRECTNESS,
            priority = 6,
            severity = Severity.WARNING,
            implementation = Implementation(
                SampleCodeDetector::class.java,
                Scope.JAVA_FILE_SCOPE
            )
        )
    }
}
The Issue registration is pretty self-explanatory, and the details
about issue registration are covered in the basics
chapter. The excessive comments here are there to explain the sample,
and there are usually no comments in issue registration code like this.
Note how on line 29, the Issue registration names the Detector
class responsible for analyzing this issue: SampleCodeDetector. In
the above I deleted the body of that class; here it is now without the
issue registration at the end:
package com.example.lint.checks

import com.android.tools.lint.client.api.UElementHandler
import com.android.tools.lint.detector.api.Category
import com.android.tools.lint.detector.api.Detector
import com.android.tools.lint.detector.api.Detector.UastScanner
import com.android.tools.lint.detector.api.Implementation
import com.android.tools.lint.detector.api.Issue
import com.android.tools.lint.detector.api.JavaContext
import com.android.tools.lint.detector.api.Scope
import com.android.tools.lint.detector.api.Severity
import org.jetbrains.uast.UElement
import org.jetbrains.uast.ULiteralExpression
import org.jetbrains.uast.evaluateString

class SampleCodeDetector : Detector(), UastScanner {
    override fun getApplicableUastTypes(): List<class<out uelement?="">> {
        return listOf(ULiteralExpression::class.java)
    }

    override fun createUastHandler(context: JavaContext): UElementHandler {
        return object : UElementHandler() {
            override fun visitLiteralExpression(node: ULiteralExpression) {
                val string = node.evaluateString() ?: return
                if (string.contains("lint") && string.matches(Regex(".*\\blint\\b.*"))) {
                    context.report(
                        ISSUE, node, context.getLocation(node),
                        "This code mentions `lint`: **Congratulations**"
                    )
                }
            }
        }
    }
}
This lint check is very simple; for Kotlin and Java files, it visits all the literal strings, and if the string contains the word “lint”, then it issues a warning.
This is using a very general mechanism of AST analysis; specifying the
relevant node types (literal expressions, on line 18) and visiting them
on line 23. Lint has a large number of convenience APIs for doing
higher level things, such as “call this callback when somebody extends
this class”, or “when somebody calls a method named ”foo“, and so on.
Explore the SourceCodeScanner and other Detector interfaces to see
what's possible. We'll hopefully also add more dedicated documentation
for this.
Last but not least, let's not forget the unit test:
package com.example.lint.checks

import com.android.tools.lint.checks.infrastructure.TestFiles.java
import com.android.tools.lint.checks.infrastructure.TestLintTask.lint
import org.junit.Test

class SampleCodeDetectorTest {
    @Test
    fun testBasic() {
        lint().files(
            java(
                """
                package test.pkg;
                public class TestClass1 {
                    // In a comment, mentioning "lint" has no effect
                    private static String s1 = "Ignore non-word usages: linting";
                    private static String s2 = "Let's say it: lint";
                }
                """
            ).indented()
        )
        .issues(SampleCodeDetector.ISSUE)
        .run()
        .expect(
            """
            src/test/pkg/TestClass1.java:5: Warning: This code mentions lint: Congratulations [ShortUniqueId]
                private static String s2 = "Let's say it: lint";
                                           ∼∼∼∼∼∼∼∼∼∼∼∼∼∼∼∼∼∼∼∼
            0 errors, 1 warnings
            """
        )
    }
}
As you can see, writing a lint unit test is very simple, because lint ships with a dedicated testing library; this is what the
testImplementation "com.android.tools.lint:lint-tests:$lintVersion"dependency in build.gradle pulled in.
Unit testing lint checks is covered in depth in the unit testing chapter, so we'll cut the explanation of the above test short here.
Lint will look for jar files with a service registry key for issue registries.
You can manually point it to your custom lint checks jar files by using
the environment variable ANDROID_LINT_JARS:
$ export ANDROID_LINT_JARS=/path/to/first.jar:/path/to/second.jar
(On Windows, use ; instead of : as the path separator)
However, that is only intended for development and as a workaround for build systems that do not have direct support for lint or embedded lint libraries, such as the internal Google build system.
Android libraries are shipped as .aar files instead of .jar files.
This means that they can carry more than just the code payload. Under
the hood, .aar files are just zip files which contain many other
nested files, including api and implementation jars, resources,
proguard/r8 rules, and yes, lint jars.
For example, if we look at the contents of the timber logging library's AAR file, we can see the lint.jar with several lint checks within as part of the payload:
$ jar tvf ~/.gradle/caches/.../jakewharton.timber/timber/4.5.1/?/timber-4.5.1.aar
   216 Fri Jan 20 14:45:28 PST 2017 AndroidManifest.xml
  8533 Fri Jan 20 14:45:28 PST 2017 classes.jar
 10111 Fri Jan 20 14:45:28 PST 2017 lint.jar
    39 Fri Jan 20 14:45:28 PST 2017 proguard.txt
     0 Fri Jan 20 14:45:24 PST 2017 aidl/
     0 Fri Jan 20 14:45:28 PST 2017 assets/
     0 Fri Jan 20 14:45:28 PST 2017 jni/
     0 Fri Jan 20 14:45:28 PST 2017 res/
     0 Fri Jan 20 14:45:28 PST 2017 libs/
The advantage of this approach is that when lint notices that you depend on a library, and that library contains custom lint checks, then lint will pull in those checks and apply them. This gives library authors a way to provide their own additional checks enforcing usage.
The Android Gradle library plugin provides some special configurations,
lintConfig and lintPublish.
The lintPublish configuration lets you reference another project, and
it will take that project's output jar and package it as a lint.jar
inside the AAR file.
The https://github.com/googlesamples/android-custom-lint-rules sample project demonstrates this setup.
The :checks project is a pure Kotlin library which depends on the
Lint APIs, implements a Detector, and provides an IssueRegistry
which is linked from META-INF/services.
Then in the Android library, the :library project applies the Android
Gradle library plugin. It then specifies a lintPublish configuration
referencing the checks lint project:
apply plugin: 'com.android.library'
dependencies {
    lintPublish project(':checks')
    // other dependencies
}
Finally, the sample :app project is an example of an Android app
which depends on the library, and the source code in the app contains a
violation of the lint check defined in the :checks project. If you
run ./gradlew :app:lint to analyze the app, the build will fail
emitting the custom lint check.
What if you aren't publishing a library, but you'd like to apply some checks locally for your own codebase?
You can use a similar approach to lintPublish: In your app
module, specify
apply plugin: 'com.android.application'
dependencies {
    lintConfig project(':checks')
    // other dependencies
}
Now, when lint runs on this application, it will apply the checks provided from the given project.
Lint has a dedicated testing library for lint checks. To use it, add this dependency to your lint check Gradle project:
testImplementation "com.android.tools.lint:lint-tests:$lintVersion"This lends itself nicely to test-driven development. When we get bug reports of a false positive, we typically start by adding the text for the repro case, ensure that the test is failing, and then work on the bug fix (often setting breakpoints and debugging through the unit test) until it passes.
Here's a sample lint unit test for a simple, sample lint check which just issues warnings whenever it sees the word “lint” mentioned in a string:
package com.example.lint.checks

import com.android.tools.lint.checks.infrastructure.TestFiles.java
import com.android.tools.lint.checks.infrastructure.TestLintTask.lint
import org.junit.Test

class SampleCodeDetectorTest {
    @Test
    fun testBasic() {
        lint().files(
            java(
                """
                package test.pkg;
                public class TestClass1 {
                    // In a comment, mentioning "lint" has no effect
                    private static String s1 = "Ignore non-word usages: linting";
                    private static String s2 = "Let's say it: lint";
                }
                """
            ).indented()
        )
        .issues(SampleCodeDetector.ISSUE)
        .run()
        .expect(
            """
            src/test/pkg/TestClass1.java:5: Warning: This code mentions lint: Congratulations [ShortUniqueId]
                private static String s2 = "Let's say it: lint";
                                           ∼∼∼∼∼∼∼∼∼∼∼∼∼∼∼∼∼∼∼∼
            0 errors, 1 warnings
            """
        )
    }
}
Lint's testing API is a “fluent API”; you chain method calls together, and the return objects determine what is allowed next.
Notice how we construct a test object here on line 10 with the lint()
call. This is a “lint test task”, which has a number of setup methods
on it (such as the set of source files we want to analyze), the issues
it should consider, etc.
Then, on line 23, the run() method. This runs the lint unit test, and
then it returns a result object. On the result object we have a number
of methods to verify that the test succeeded. For a test making sure we
don't have false positives, you can just call expectClean(). But the
most common operation is to call expect(output).
This is the recommended practice for lint checks. It may be tempting to avoid “duplication” of repeating error messages in the tests (“DRY”), so some developers have written tests where they just assert that a given test has say “2 warnings”. But this isn't testing that the error range is exactly what you expect (which matters a lot when users are seeing the lint check from the IDE, since that's the underlined region), and it could also continue to pass even if the errors flagged are no longer what you intended.
Finally, even if the location is correct today, it may not be correct tomorrow. Several times in the past, some unit tests in lint's built-in checks have started failing after an update to the Kotlin compiler because of some changes to the AST which required tweaks here and there.
You may wonder how we knew what to paste into our expect call
to begin with.
We didn't. When you write a test, simply start with
expect(""), and run the test. It will fail. You can now
copy the actual output into the expect call as the expected
output, provided of course that it's correct!
On line 11, we construct a Java test file. We call java(...) and pass
in the source file contents. This constructs a TestFile, and there
are a number of different types of test source files, such as for
Kotlin files, manifest files, icons, property files, and so on.
Using test file descriptors like this has a number of advantages over the traditional approach of checking in test files as sources:
ApiDetectorTest has 157 individual
unit tests.
projectProperties().compileSdk(17) and
manifest().minSdk(5).targetSdk(17) construct a project.properties
and an AndroidManifest.xml file with the correct contents to
specify for example the right minSdkVersion and targetSdkVersion.
For icons, we can construct bitmaps like this:
        image("res/mipmap-hdpi/my_launcher2_round.png", 50, 50)
           .fillOval(0, 0, 50, 50, 0xFFFFFFFF)
           .text(5, 5, "x", 0xFFFFFFFF))
java() or kotlin() test sources, we
don't have to name the files, because lint will analyze the source
code and figure out what the class file should be named and where to
place it.
Notice how in the above Kotlin unit tests we used raw strings, and we indented the sources to be flush with the opening “”“ string delimiter.
You might be tempted to call .trimIndent() on the raw string.
However, doing that would break the above nested syntax highlighting
method (or at least it used to). Therefore, instead, call .indented()
on the test file itself, not the string, as shown on line 20.
Note that we don't need to do anything with the expect call; lint
will automatically call trimIndent() on the string passed in to it.
Kotlin requires that raw strings have to escape the dollar ($) character. That's normally not a problem, but for some source files, it makes the source code look really messy and unreadable.
For that reason, lint will actually convert $ into $ (a unicode wide dollar sign). Lint lets you use this character in test sources, and it always converts the test output to use it (though it will convert in the opposite direction when creating the test sources on disk).
If your lint check registers quickfixes with the reported incidents, it's trivial to test these as well.
For example, for a lint check result which flags two incidents, with a single quickfix, the unit test looks like this:
lint().files(...)
    .run()
    .expect(expected)
    .expectFixDiffs(
        ""
        + "Fix for res/layout/textsize.xml line 10: Replace with sp:\n"
        + "@@ -11 +11\n"
        + "-         android:textSize=\"14dp\" />\n"
        + "+         android:textSize=\"14sp\" />\n"
        + "Fix for res/layout/textsize.xml line 15: Replace with sp:\n"
        + "@@ -16 +16\n"
        + "-         android:textSize=\"14dip\" />\n"
        + "+         android:textSize=\"14sp\" />\n");
The expectFixDiffs method will iterate over all the incidents it
found, and in succession, apply the fix, diff the two sources, and
append this diff along with the fix message into the log.
When there are multiple fixes offered for a single incident, it will iterate through all of these too:
lint().files(...)
    .run()
    .expect(expected)
    .expectFixDiffs(
        + "Fix for res/layout/autofill.xml line 7: Set autofillHints:\n"
        + "@@ -12 +12\n"
        + "          android:layout_width=\"match_parent\"\n"
        + "          android:layout_height=\"wrap_content\"\n"
        + "+         android:autofillHints=\"|\"\n"
        + "          android:hint=\"hint\"\n"
        + "          android:inputType=\"password\" >\n"
        + "Fix for res/layout/autofill.xml line 7: Set importantForAutofill=\"no\":\n"
        + "@@ -13 +13\n"
        + "          android:layout_height=\"wrap_content\"\n"
        + "          android:hint=\"hint\"\n"
        + "+         android:importantForAutofill=\"no\"\n"
        + "          android:inputType=\"password\" >\n"
        + "  \n");
Let's say you're writing a lint check for something like the
AndroidX library's RecyclerView widget.
In this case, it's highly likely that your unit test will reference
RecyclerView. But how does lint know what RecyclerView is? If it
doesn't, type resolve won't work, and as a result the detector won't.
You could make your test ”depend“ on the recyclerview. This is
possible, using the LibraryReferenceTestFile, but is not recommended.
Instead, the recommended approach is to just use ”stubs“; create skeleton classes which represent only the signatures of the library, and in particular, only the subset that your lint check cares about.
For example, for lint's own recycler view test, the unit test declares a field holding the recycler view stub:
private val recyclerViewStub = java(
    """
    package android.support.v7.widget;

    import android.content.Context;
    import android.util.AttributeSet;
    import android.view.View;
    import java.util.List;

    // Just a stub for lint unit tests
    public class RecyclerView extends View {
        public RecyclerView(Context context, AttributeSet attrs) {
            super(context, attrs);
        }

        public abstract static class ViewHolder {
            public ViewHolder(View itemView) {
            }
        }

        public abstract static class Adapter<vh extends="" viewholder=""> {
            public abstract void onBindViewHolder(VH holder, int position);
            public void onBindViewHolder(VH holder, int position, List<object> payloads) {
            }
            public void notifyDataSetChanged() { }
        }
    }
    """
).indented()
And now, all the other unit tests simply include recyclerViewStub
as one of the test files. For a larger example, see
this test.
If you need to use binaries in your unit tests, there is a special test file type for that: base64gzip. Here's an example from a lint check which tries to recognize usage of Cordova in the bytecode:
fun testVulnerableCordovaVersionInClasses() {
    lint().files(
        base64gzip(
            "bin/classes/org/apache/cordova/Device.class",
            "" +
                "yv66vgAAADIAFAoABQAPCAAQCQAEABEHABIHABMBAA5jb3Jkb3ZhVmVyc2lv" +
                "bgEAEkxqYXZhL2xhbmcvU3RyaW5nOwEABjxpbml0PgEAAygpVgEABENvZGUB" +
                "AA9MaW5lTnVtYmVyVGFibGUBAAg8Y2xpbml0PgEAClNvdXJjZUZpbGUBAAtE" +
                "ZXZpY2UuamF2YQwACAAJAQAFMi43LjAMAAYABwEAGW9yZy9hcGFjaGUvY29y" +
                "ZG92YS9EZXZpY2UBABBqYXZhL2xhbmcvT2JqZWN0ACEABAAFAAAAAQAJAAYA" +
                "BwAAAAIAAQAIAAkAAQAKAAAAHQABAAEAAAAFKrcAAbEAAAABAAsAAAAGAAEA" +
                "AAAEAAgADAAJAAEACgAAAB4AAQAAAAAABhICswADsQAAAAEACwAAAAYAAQAA" +
                "AAUAAQANAAAAAgAO"
        )`
    ).run().expect(
Here, ”base64gzip“ means that the file is gzipped and then base64 encoded.
If you want to compute the base64gzip string for a given file, a simple way to do it is to add this statement at the beginning of your test:
assertEquals("", TestFiles.toBase64gzip(File("/tmp/mybinary.bin")))The test will fail, and now you have your output to copy/paste into the test.
However, if you're writing byte-code based tests, don't just hard code in the .class file or .jar file contents like this. Lint's own unit tests did that, and it's hard to later reconstruct what the byte code was later if you need to make changes or extend it to other bytecode formats.
Instead, use the new compiled or bytecode test files. The key here
is that they automate a bit of the above process: the test file
provides a source test file, as well as a set of corresponding binary
files (since a single source file can create multiple class files, and
for Kotlin, some META-INF data).
Initially, you just specify the sources, and when no binary data has been provided, lint will instead attempt to compile the sources and emit the full test file registration.
This isn't just a convenience; lint's test infrastructure also uses this to test some additional scenarios (for example, in a multi- module project it will only provide the binaries, not the sources, for upstream modules.)
When your detector reports an incident, it can also provide one or more “quick fixes“, which are actions the users can invoke in the IDE (or, for safe fixes, in batch mode) to address the reported incident.
For example, if the lint check reports an unused resource, a quick fix could offer to remove the unused resource.
In some cases, quick fixes can take partial steps towards fixing the problem, but not fully. For example, the accessibility lint check which makes sure that for images you set a content description, the quickfix can offer to add it — but obviously it doesn't know what description to put. In that case, the lint fix will go ahead and add the attribute declaration with the correct namespace and attribute name, but will leave the value up to the user (so it uses a special quick fix provided by lint to place a TODO marker as the value, along with selecting just that TODO string such that the user can type to replace without having to manually delete the TODO string first.)
The class in lint which represents a quick fix is LintFix.
Note that LintFix is not a class you can subclass and then for
example implement your own arbitrary code in something like a
perform() method.
Instead, LintFix has a number of builders where you describe the
action that you would like the quickfix to take. Then, lint will offer
that quickfix in the IDE, and when the user invokes it, lint runs its
own implementation of the various descriptors.
The historical reason for this is that many of the quickfixes in lint depended on machinery in the IDE (such as code and import cleanup after an edit operation) that isn't available in lint itself, along with other concepts that only make sense in the IDE, such as moving the caret, opening files, selecting text, and so on.
More recently, this is also used to persist quickfixes properly for later reuse; this is required for partial analysis.
Lint fixes use a ”fluent API“; you first construct a LintFix, and on
that method you call various available type methods, which will then
further direct you to the allowed options.
For example, to create a lint fix to set an XML attribute of a given name to ”true“, use something like this:
LintFix fix = fix().set(null, "singleLine", "true").build()
Here the fix() method is provided by the Detector super class, but
that's just a utility method for LintFix.fix() (or in older versions,
LintFix.create()).
There are a number of additional, common methods you can set on
the fix() object:
name: Sets the description of the lint fix. This should be brief;
it's in the quickfix popup shown to the user.
sharedName: This sets the ”shared“ or ”family“ name: all fixes in
the file will with the same name can be applied in a single
invocation by the user. For example, if you register 500 ”Remove
unused import“ quickfixes in a file, you don't want to force the user
to have to invoke each and every one. By setting the shared name, the
user will be offered to Fix All $family name problems in the
current file, which they can then perform to have all 500
individual fixes applied in one go.
autoFix: If you get a lint report and you notice there are a lot of
incidents that lint can fix automatically, you don't want to have to
go and open each and every file and all the fixes in the file.
Therefore, lint can apply the fixes in batch mode; the Gradle
integration has a lintFix target to perform this, and the lint
command has an --apply-suggestions option.
However, many quick fixes require user intervention. Not just the
ones where the user has to choose among alternatives, and not just
the ones where the quick fix inserts a placeholder value like TODO.
Take for example lint's built-in check which requires overrides of a
method annotated with @CallSuper to invoke super. on the
overridden method. Where should we insert the call — at the
beginning? At the end?
Therefore, lint has the autoFix property you can set on a quickfix.
This indicates that this fix is ”safe“ and can be performed in batch
mode. When the lintFix target runs, it will only apply fixes marked
safe in this way.
The current set of available quick fix types are:
fix().replace: String replacements. This is the most general
mechanism, and allows you to perform arbitrary edits to the source
code. In addition to the obvious ”replace old string with new“, the
old string can use a different location range than the incident
range, you can match with regular expressions (and perform
replacements on a specific group within the regular expression), and
so on.
This fix is also the most straightforward way to delete text.
It offers some useful cleanup operations:
fix().annotate: Annotating an element. This will add (or optionally
replace) an annotation on a source element such as a method. It will
also handle import management.
fix().set: Add XML attributes. This will insert an attribute into
the given element, applying the user's code style preferences for
where to insert the attribute. (In Android XML for example there's a
specific sorting convention which is generally alphabetical, except
layout params go before other attributes, and width goes before
height.)
You can either set the value to something specific, or place the caret inside the newly created empty attribute value, or set it to TODO and select that text for easy type-to-replace.
todo() quickfix, it's a good idea to special case
your lint check to deliberately not accept ”TODO“ as a valid value.
For example, for lint's accessibility check which makes sure you set
a content description, it will complain both when you haven't set
the content description attribute, and if the text is set to
”TODO“. That way, if the user applies the quickfix, which creates
the attribute in the right place and moves the focus to the right
place, the editor is still showing a warning that the content
description should be set.
fix().unset: Remove XML attribute. This is a special case of add
attribute.
fix().url: Show URL. In some cases, you can't ”fix“ or do anything
local to address the problem, but you really want to direct the
user's attention to additional documentation. In that case, you can
attach a ”show this URL“ quick fix to the incident which will open
the browser with the given URL when invoked. For example, in a
complicated deprecation where you want users to migrate from one
approach to a completely different one that you cannot automate, you
could use something like this:val message = "Job scheduling with `GcmNetworkManager` is deprecated: Use AndroidX `WorkManager` instead"
val fix = fix()
.url("https://developer.android.com/topic/libraries/architecture/workmanager/migrating-gcm")
.build()You might notice that lint's APIs to report incidents only takes a single quick fix instead of a list of fixes.
But let's say that it did take a list of quick fixes.
Both scenarios have their uses, so lint makes this explicit:
fix().composite: create a ”composite“ fix, which composes the fix
out of multiple individual fixes, or
fix().alternatives: create an ”alternatives“ fix, which holds a
number of individual fixes, which lint will present as separate
options to the user.Here's an example of how to create a composite fix, which will be performed as a unit; here we're both setting a new attribute and deleting a previous attribute:
val fix = fix().name("Replace with singleLine=\"true\"")
    .composite(
        fix().set(ANDROID_URI, "singleLine", "true").build(),
        fix().unset(namespace, oldAttributeName).build()
    )
And here's an example of how to create an alternatives fix, which are offered to the user as separate options; this is from our earlier example of the accessibility check which requires you to set a content description, which can be set either on the ”text“ attribute or the “contentDescription” attribute:
val fix = fix().alternatives(
    fix().set().todo(ANDROID_URI, "text").build(),
    fix().set().todo(ANDROID_URI, "contentDescription")
.build())It would be nice if there was an AST manipulation API, similar to UAST for visiting ASTs, that quickfixes could use to implement refactorings, but we don't have a library like that. And it's unlikely it would work well; when you rewrite the user's code you typically have to take language specific conventions into account.
Therefore, today, when you create quickfixes for Kotlin and Java code,
if the quickfix isn't something simple which would work for both
languages, then you need to conditionally create either the Kotlin
version or the Java version of the quickfix based on whether the source
file it applies to is in Kotlin or Java. (For an easy way to check you
can use the isKotlin or isJava package level methods in
com.android.tools.lint.detector.api.)
However, it's often the case that the quickfix is something simple which would work for both; that's true for most of the built-in lint checks with quickfixes for Kotlin and Java.
The replace string quick fix allows you to match the text to
with regular expressions.
You can also use back references in the regular expression such that the quick fix replacement text includes portions from the original string.
Here's an example from lint's AssertDetector:
val fix = fix().name("Surround with desiredAssertionStatus() check")
    .replace()
    .range(context.getLocation(assertCall))
    .pattern("(.*)")
    .with("if (javaClass.desiredAssertionStatus()) { \\k<1> }")
    .reformat(true)
    .build()
The replacement string's back reference above, on line 5, is \k<1>. If there were multiple regular expression groups in the replacement string, this could have been \k<2>, \k<3>, and so on.
Here's how this looks when applied, from its unit test:
lint().files().run().expectFixDiffs(
    """
    Fix for src/test/pkg/AssertTest.kt line 18: Surround with desiredAssertionStatus() check:
    @@ -18 +18
    -         assert(expensive()) // WARN
    +         if (javaClass.desiredAssertionStatus()) { assert(expensive()) } // WARN
    """
)
Note that the lint has an option (--describe-suggestions) to emit
an XML file which describes all the edits to perform on documents to
apply a fix. This maps all quick fixes into chapter edits (including
XML logic operations). This can be (and is, within Google) used to
integrate with code review tools such that the user can choose whether
to auto-fix a suggestion right from within the code review tool.
This chapter describes Lint's “partial analysis”; its architecture and APIs for allowing lint results to be cached.
This focuses on how to write or update existing lint checks such that they work correctly under partial analysis. For other details about partial analysis, such as the client side implemented by the build system, see the lint internal docs folder.
This is because coordinating partial results and merging is
performed by the LintClient; e.g. in the IDE, there's no good
reason to do all this extra work (because all sources are generally
available, including “downstream” module info like the
minSdkVersion).
Right now, only the Android Gradle Plugin turns on partial analysis mode. But that's a very important client, since it's usually how lint checks are performed on continuous integration servers to validate code reviews.
Many lint checks require “global” analysis. For example you can't determine whether a particular string defined in a library module is unused unless you look at all modules transitively consuming this library as well.
However, many developers run lint as part of their continuous integration. Particularly in large projects, analyzing all modules for every check-in is too costly.
This chapter describes lint's architecture for handling this, such that module results can be cached.
Briefly stated, lint's architecture for this is “map reduce”: lint now has two separate phases, analyze and report (map and reduce respectively):
Crucially, the individual module results can be cached, such that if nothing has changed in a module, the module results continue to be valid (unless signatures have changed in libraries it depends on.)
Making this work requires some modifications to any Detector which
considers data from outside the current module. However, there are some
very common scenarios that lint has special support for to make this
easier.
Detectors fit into one of the following categories (and these categories will be explained in subsequent sessions) :
minSdkVersion <
   21
. Lint has special support for this; you basically report an
incident and attach a “constraint” to it. Lint calls these, and
incidents reported as part of #3 below, as “provisional incidents”.
These are listed in increasing order of effort, and thankfully, they're also listed in order of frequency. For lint's built-in checks (~385),
At this point you're probably wondering whether your checks are in the 89% category where you don't need to do anything, or in the remaining 11%. How do you know?
Lint has several built-in mechanisms to try to catch problems. There are a few scenarios it cannot detect, and these are described below, but for the vast majority, simply running your unit tests (which are comprehensive, right?) should create unit test failures if your detector is doing something it shouldn't.
In Android checks, it's very common to try to access the main (“app”)
project, to see what the real minSdkVersion is, since the app
minSdkVersion can be higher than the one in the library. For the
targetSdkVersion it's even more important, since the library
targetSdkVersion has no meaningful relationship to the app one.
When you run lint unit tests, as of 7.0, it will now run your tests twice — once with global analysis (the previous behavior), and once with partial analysis. When lint is running in partial analysis, a number of calls, such as looking up the main project, or consulting the merged manifest, is not allowed during the analysis phase. Attempting to do so will generate an error:
    SdCardTest.java: Error: The lint detector
        com.android.tools.lint.checks.SdCardDetector
    called context.getMainProject() during module analysis.

    This does not work correctly when running in Lint Unit Tests.

    In particular, there may be false positives or false negatives because
    the lint check may be using the minSdkVersion or manifest information
    from the library instead of any consuming app module.

    Contact the vendor of the lint issue to get it fixed/updated (if
    known, listed below), and in the meantime you can try to work around
    this by disabling the following issues:

    "SdCardPath"

    Issue Vendor:
    Vendor: Android Open Source Project
    Contact: https://groups.google.com/g/lint-dev
    Feedback: https://issuetracker.google.com/issues/new?component=192708

    Call stack: Context.getMainProject(Context.kt:117)←SdCardDetector$createUastHandler$1.visitLiteralExpression(SdCardDetector.kt:66)
        ←UElementVisitor$DispatchPsiVisitor.visitLiteralExpression(UElementVisitor.kt:791)
        ←ULiteralExpression$DefaultImpls.accept(ULiteralExpression.kt:38)
        ←JavaULiteralExpression.accept(JavaULiteralExpression.kt:24)←UVariableKt.visitContents(UVariable.kt:64)
        ←UVariableKt.access$visitContents(UVariable.kt:1)←UField$DefaultImpls.accept(UVariable.kt:92)
        ...
Specific examples of information many lint checks look at in this category:
minSdkVersion and targetSdkVersion
Lint will also modify the unit test when running the test in partial
analysis mode. In particular, let's say your test has a manifest which
sets minSdkVersion to 21.
Lint will instead run the analysis task on a modified test project
where the minSdkVersion is set to 1, and then run the reporting task
where minSdkVersion is set back to 21. This ensures that lint checks
will correctly use the minSdkVersion from the main project, not the
library.
Lint will also diff the report output from running the same unit tests both in global analysis mode and in partial analysis mode. We expect the results to always be identical, and in some cases if the module analysis is not written correctly, they're not.
The above three mechanisms will catch most problems related to partial analysis. However, there are a few remaining scenarios to be aware of:
UCallExpression) you can call resolve()
on it to find the called PsiMethod, and from there you can look at
its source code, to make some decisions.
For example, lint's API Check uses this to see if a given method is a
version-check utility (“SDK_INT > 21?”); it resolves the method
call in if (isOnLollipop()) { ... } and looks at its method body to
see if the return value corresponds to a proper SDK_INT check.
In partial analysis mode, you cannot look at source files from libraries you depend on; they will only be provided in binary (bytecode inside a jar file) form.
This means that instead, you need to aggregate data along the way. For example, the way lint handles the version check method lookup is to look for SDK_INT comparisons, and if found, stores a reference to the method in ther partial results map which it can later consult from downstream modules.
In order to test for correct operation of your check, you should add your own individual unit test for a multi-module project.
Lint's unit test infrastructure makes this easy; just use relative paths in the test file descriptions.
For example, if you have the following unit test declaration:
   lint().files(
       manifest().minSdk(15),
       manifest().to("../app/AndroidManifest.xml").minSdk(21),
       xml(
           "res/layout/linear.xml",
           "<linearlayout ...="">" + ...
The second manifest() call here on line 3 does all the heavy lifting:
the fact that you're referencing ../app means it will create another
module named “app”, and it will add a dependency from that module on
this one. It will also mark the current module as a library. This is
based on the name patterns; if you for example reference say ../lib1,
it will assume the current module is an app module and the dependency
will go from here to the library.
Finally, to test a multi-module setup where the code in the other
module is only available as binary, lint has a new special test file
type. The CompiledSourceFile can be constructed via either
compiled(), if you want to make both the source code and the class
file available in the project, or bytecode() if you want to only
provide the bytecode. In both cases you include the source code in the
test file declaration, and the first time you run your test it will try
to run compilation and emit the extra base64 string to include the test
file. By having the sources included for the binary it's easy to
regenerate bytecode tests later (this was an issue with some of lint's
older unit tests; we recently decompiled them and created new test
files using this mechanism to make the code more maintainable.
Lint's partial analysis testing support will automatically only use
binaries for the dependencies (even if using CompiledSourceFile with
sources).
In the past, you would typically report problems like this:
    context.report(
        ISSUE,
        element,
        context.getNameLocation(element),
        "Missing `contentDescription` attribute on image"
    )
At some point, we added support for quickfixes, so the report method took an additional parameter, line 6:
    context.report(
        ISSUE,
        element,
        context.getNameLocation(element),
        "Missing `contentDescription` attribute on image",
        fix().set().todo(ANDROID_URI, ATTR_CONTENT_DESCRIPTION).build()
)
Now that we need to attach various additional data (like constraints and maps), we don't really want to just add more parameters.
Instead, this tuple of data about a particular occurrence of a problem
is called an “incident”, and there is a new Incident class which
represents it. To report an incident you simply call
context.report(incident). There are several ways to create these
incidents. The easiest is to simply edit your existing call above by
adding Incident( (or from Java, new Incident() inside the
context.report block like this:
    context.report(Incident(
        ISSUE,
        element,
        context.getNameLocation(element),
        "Missing `contentDescription` attribute on image"
    ))
and then reformatting the source code:
    context.report(
        Incident(
            ISSUE,
            element,
            context.getNameLocation(element),
            "Missing `contentDescription` attribute on image"
        )
)
Incident has a number of overloaded constructors to make it easy to
construct it from existing report calls.
There are other ways to construct it too, for example like the following:
    Incident(context)
        .issue(ISSUE)
        .scope(node)
        .location(context.getLocation(node))
        .message("Do not hardcode \"/sdcard/\"").report()
That are additional methods you can fall too, like fix(), and
conveniently, at() which specifies not only the scope node but
automatically computes and records the location of that scope node too,
such that the following is equivalent:
    Incident(context)
        .issue(ISSUE)
        .at(node)
        .message("Do not hardcode \"/sdcard/\"").report()
So step one to partial analysis is to convert your code to report
incidents instead of the passing in all the individual properties of an
incident. Note that for backwards compatibility, if your check doesn't
need any work for partial analysis, you can keep calling the older
report methods; they will be redirected to an Incident call
internally, but since you don't need to attach data you don't have to
make any changes
If your check needs to be conditional, perhaps on the minSdkVersion,
you need to attach a “constraint” to your report call.
All the constraints are built in; there isn't a way to implement your own. For custom logic, see the next section: LintMaps.
Here are the current constraints, though this list may grow over time:
These are package-level functions, though from Java you can access them
from the Constraints class.
Recording an incident with a constraint is easy; first construct the
Incident as before, and then report them via
context.report(incident, constraint):
    String message =
        "One or more images in this project can be converted to "
        + "the WebP format which typically results in smaller file sizes, "
        + "even for lossless conversion";
    Incident incident = new Incident(WEBP_ELIGIBLE, location, message);
    context.report(incident, minSdkAtLeast(18));
Finally, note that you can combine constraints; there are both “and”
and “or” operators defined for the Constraint class. so the following
is valid:
    val constraint = targetSdkAtLeast(23) and notLibraryProject()
    context.report(incident, constraint)
That's all you have to do. Lint will record this provisional incident, and when it is performing reporting, it will evaluate these constraints on its own and only report incidents that meet the constraint.
In some cases, you cannot use one of the built-in constraints; you have to do your own “filtering” from the reporting task, where you have access to the main module.
In that case, you call context.report(incident, map) instead.
Like Incident, LintMap is a new data holder class in lint which
makes it convenient to pass around (and more importantly, persist)
data. All the set methods return the map itself, so you can easily
chain property calls.
Here's an example:
    context.report(
        incident,
        map()
            .put(KEY_OVERRIDES, overrides)
            .put(KEY_IMPLICIT, implicitlyExportedPreS)
    )
Here, map() is a method defined by Detector to create a new
LintMap, similar to how fix() constructs a new LintFix.
Note however that when reporting data, you need to do the post processing yourself. To do this, you need to override this method:
    /**
     * Filter which looks at incidents previously reported via
     * [Context.report] with a [LintMap], and returns false if the issue
     * does not apply in the current reporting project context, or true
     * if the issue should be reported. For issues that are accepted,
     * the detector is also allowed to mutate the issue, such as
     * customizing the error message further.
     */
    open fun filterIncident(context: Context, incident: Incident, map: LintMap): Boolean { }
For example, for the above report call, the corresponding
implementation of filterIncident looks like this:
    override fun filterIncident(context: Context, incident: Incident, map: LintMap): Boolean {
        if (context.mainProject.targetSdk < 19) return true
        if (map.getBoolean(KEY_IMPLICIT, false) == true && context.mainProject.targetSdk >= 31) return true
        return map.getBoolean(KEY_OVERRIDES, false) == false
    }
Note also that you are allowed to modify incidents here before reporting them. The most common reason scenario for this is changing the incident message, perhaps to reflect data not known at module analysis time. For example, lint's API check creates messages like this:
Error: Cast from AudioFormat to Parcelable requires API level 24 (current min is 21)
At module analysis time when the incident was created, the minSdk being 21 was not known (and in fact can vary if this library is consumed by many different app modules!)
filterInstance is called on is not the same
instance as the one which originally reported it. If you think about
it, that makes sense; when module results are cached, the same
reported data can be used over and over again for repeated builds,
each time for new detector instances in the reporting task.The last (and most involved) scenario for partial analysis is one where you cannot just create incidents and filter or customize them later.
The most complicated example of this is lint's built-in
UnusedResourceDetector, which locates unused resources. This “requires”
global analysis, since we want to include all resources in the entire
project. We also cannot just store lists of “resources declared” and
“resources referenced“ since we really want to treat this as a graph.
For example if @layout/main is including @drawable/icon, then a
naive approach would see the icon as referenced (by main) and therefore
mark it as not unused. But what we want is that if the icon is only
referenced from main, and if main is unused, then so is the icon.
To handle this, we model the resources as a graph, with edges representing references.
When analyzing individual modules, we create the resource graph for
just that model, and we store that in the results. That means we store
it in the module's LintMap. This is a map for the whole module
maintained by lint, so you can access it repeatedly and add to it.
(This is also where lint's API check stores the SDK_INT comparison
functions as described earlier in this chapter).
The unused resource detector creates a persistence string for the graph, and records that in the map.
Then, during reporting, it is given access to all the lint maps for all the modules that the reporting module depends on, including itself. It then merges all the graphs into a single reference graph.
For example, let's say in module 1 we have layout A which includes drawables B and D, and B in turn depends on color C. We get a resource graph like the following:
Then in another module, we have the following resource reference graph:
In the reporting task, we merge the two graphs like the following:
Once that's done, it can proceed precisely as before: analyze the graph and report all the resources that are not reachable from the reference roots (e.g. manifest and used code).
The way this works in code is that you report data into the module by
first looking up the module data map, by calling this method on the
Context:
    /**
     * Returns a [PartialResult] where state can be stored for later
     * analysis. This is a more general mechanism for reporting
     * provisional issues when you need to collect a lot of data and do
     * some post processing before figuring out what to report and you
     * can't enumerate out specific [Incident] occurrences up front.
     *
     * Note that in this case, the lint infrastructure will not
     * automatically look up the error location (since there isn't one
     * yet) to see if the issue has been suppressed (via annotations,
     * lint.xml and other mechanisms), so you should do this
     * yourself, via the various [LintDriver.isSuppressed] methods.
     */
    fun getPartialResults(issue: Issue): PartialResult { ... }
Then you put whatever data you want, such as the resource usage model encoded as a string.
And then your detector should also override the following method, where you can walk through the map contents, compute incidents and report them:
    /**
     * Callback to detectors that add partial results (by adding entries
     * to the map returned by [LintClient.getPartialResults]). This is
     * where the data should be analyzed and merged and results reported
     * (via [Context.report]) to lint.
     */
open fun checkPartialResults(context: Context, partialResults: PartialResult) { ... }Most lint checks run on the fly in the IDE editor as well. In some cases, if all the map computations are expensive, you can check whether partial analysis is in effect, and if not, just directly access (for example) the main project.
Do this by calling isGlobalAnalysis():
   if (context.isGlobalAnalysis()) {
       // shortcut
   } else {
       // partial analysis code path
   }
This chapter contains a random collection of questions people have asked in the past.
If you've for example implemented the Detector callback for visiting
method calls, visitMethodCall, notice how the third parameter is a
PsiMethod, and that it is not nullable:
    open fun visitMethodCall(
        context: JavaContext,
        node: UCallExpression,
        method: PsiMethod
    ) {
This passes in the method that has been called. When lint is visiting the AST, it will resolve calls, and if the called method cannot be resolved, the callback won't be called.
This happens when the classpath that lint has been configured with does not contain everything needed. When lint is running from Gradle, this shouldn't happen; the build system should have a complete classpath and pass it to Lint (or the build wouldn't have succeeded in the first place).
This usually comes up in unit tests for lint, where you've added a test case which is referencing some API for some library, but the library itself isn't part of the test. The solution for this is to create stubs for the part of the API you care about. This is discussed in more detail in the unit testing chapter.
There are several things to check if you have a lint check which works correctly from your unit test but not in the IDE.
jar tvf
   lint.jar
to look at the jar file to make sure it contains the
service loader registration of your issue registry, and javap
-classpath lint.jar com.example.YourIssueRegistry to inspect your
issue registry.
$ANDROID_LINT_JARS environment variable to point directly to your
lint jar file and restart Studio to make sure that that works.
visitAnnotationUsage isn't called for annotations
If you want to just visit any annotation declarations (e.g. @Foo on
method foo), don't use the applicableAnnotations and
visitAnnotationUsage machinery. The purpose of that facility is to
look at elements that are being combined with annotated elements,
such as a method call to a method whose return value has been
annotated, or an argument to a method a method parameter that has been
annotated, or assigning an assigned value to an annotated variable, etc.
If you just want to look at annotations, use getApplicableUastTypes
with UAnnotation::class.java, and a UElementHandler which overrides
visitAnnotation.
To check whether an element is in Java or Kotlin, call one of the package level methods in the detector API (and from Java, you can access them as utility methods on the “Lint” class) :
package com.android.tools.lint.detector.api

/** Returns true if the given element is written in Java. */
fun isJava(element: PsiElement?): Boolean { /* ... */ }

/** Returns true if the given language is Kotlin. */
fun isKotlin(language: Language?): Boolean { /* ... */ }

/** Returns true if the given language is Java. */
fun isJava(language: Language?): Boolean { /* ... */ }
If you have a UElement and need a PsiElement for the above method,
see the next question.
PsiElement and I have a UElement ?
If you have a UElement, you can get the underlying source PSI element
by calling element.sourcePsi.
UMethod for a PsiMethod ?
Call psiMethod.toUElementOfType<umethod>(). Note that this may return
null if UAST cannot find valid Java or Kotlin source code for the
method.
For PsiField and PsiClass instances use the equivalent
toUElementOfType type arguments.
JavaEvaluator ?
The Context passed into most of the Detector callback methods
relevant to Kotlin and Java analysis is of type JavaContext, and it
has a public evaluator property which provides a JavaEvaluator you
can use in your analysis.
If you need one outside of that scenario (this is not common) you can
construct one directly by instantiating a DefaultJavaEvaluator; the
constructor parameters are nullable, and are only needed for a couple
of operations on the evaluator.
First get a JavaEvaluator as explained above, then call
this evaluator method:
open fun isInternal(owner: PsiModifierListOwner?): Boolean { /* ... */
(Note that a PsiModifierListOwner is an interface which includes
PsiMethod, PsiClass, PsiField, PsiMember, PsiVariable, etc.)
Get the JavaEvaluator as explained above, and then call one of these
evaluator method:
open fun isData(owner: PsiModifierListOwner?): Boolean { /* ... */
open fun isInline(owner: PsiModifierListOwner?): Boolean { /* ... */
open fun isLateInit(owner: PsiModifierListOwner?): Boolean { /* ... */
open fun isSealed(owner: PsiModifierListOwner?): Boolean { /* ... */
open fun isOperator(owner: PsiModifierListOwner?): Boolean { /* ... */
open fun isInfix(owner: PsiModifierListOwner?): Boolean { /* ... */
open fun isSuspend(owner: PsiModifierListOwner?): Boolean { /* ... */
Get the JavaEvaluator as explained above, then call
evaluator.findClass(qualifiedName: String). Note that the result is
nullable.
Get the JavaEvaluator as explained above, then call
evaluator.getTypeClass. To go from a class to its type,
use getClassType.
    abstract fun getClassType(psiClass: PsiClass?): PsiClassType?
    abstract fun getTypeClass(psiType: PsiType?): PsiClass?
You can directly look up annotations via the modified list
of PsiElement or the annotations for a UAnnotated element,
but if you want to search the inheritance hierarchy for
annotations (e.g. if a method is overriding another, get
any annotations specified on super implementations), use
one of these two evaluator methods:
    abstract fun getAllAnnotations(
        owner: UAnnotated,
        inHierarchy: Boolean
    ): List<uannotation>

    abstract fun getAllAnnotations(
        owner: PsiModifierListOwner,
        inHierarchy: Boolean
    ): Array<psiannotation>
To see if a method is a direct member of a particular
named class, use the following method in JavaEvaluator:
fun isMemberInClass(member: PsiMember?, className: String): Boolean { }To see if a method is a member in any subclass of a named class, use
    open fun isMemberInSubClassOf(
        member: PsiMember,
        className: String,
        strict: Boolean = false
    ): Boolean { /* ... */ }
Here, use strict = true if you don't want to include members in the
named class itself as a match.
To see if a class extends another or implements an interface, use one
of these methods. Again, strict controls whether we include the super
class or super interface itself as a match.
    abstract fun extendsClass(
        cls: PsiClass?,
        className: String,
        strict: Boolean = false
    ): Boolean

    abstract fun implementsInterface(
        cls: PsiClass,
        interfaceName: String,
        strict: Boolean = false
): BooleanIn Java, matching up the arguments in a call with the parameters in the called method is easy: the first argument corresponds to the first parameter, the second argument corresponds to the second parameter and so on. If there are more arguments than parameters, the last arguments are all vararg arguments to the last parameter.
In Kotlin, it's much more complicated. With named parameters, but
arguments can appear in any order, and with default parameters, only
some of them may be specified. And if it's an extension method, the
first argument passed to a PsiMethod is actually the instance itself.
Lint has a utility method to help with this on the JavaEvaluator:
    open fun computeArgumentMapping(
        call: UCallExpression,
        method: PsiMethod
    ): Map<uexpression, psiparameter=""> { /* ... */
This returns a map from UAST expressions (each argument to a UAST call
is a UExpression, and these are the valueArguments property on the
UCallExpression) to each corresponding PsiParameter on the
PsiMethod that the method calls.
If you need to ship different versions of your lint checks to target
different versions of lint (because perhaps you need to work both with
an older version of lint, and a newer version that has a different
API), the way to do this (as of Lint 7.0) is to use the maxApi
property on the IssueRegistry. In the service loader registration
(META-INF/services), register two issue registries; one for each
implementation, and mark the older one with the right minApi to
maxApi range, and the newer one with minApi following the previous
registry's maxApi. (Both minApi and maxApi are inclusive). When
lint loads the issue registries it will ignore registries with a range
outside of the current API level.
$ git clone --branch=mirror-goog-studio-master-dev --single-branch \
   https://android.googlesource.com/platform/tools/base
Cloning into 'base'...
remote: Total 648820 (delta 325442), reused 635137 (delta 325442)
Receiving objects: 100% (648820/648820), 1.26 GiB | 15.52 MiB/s, done.
Resolving deltas: 100% (325442/325442), done.
Updating files: 100% (14416/14416), done.

$ du -sh base
1.8G    base
$ cd base/lint
$ ls
.editorconfig           BUILD                   build.gradle            libs/
.gitignore              MODULE_LICENSE_APACHE2  cli/
$ ls libs/
intellij-core/   kotlin-compiler/ lint-api/        lint-checks/     lint-gradle/     lint-model/      lint-tests/      uast/
The built-in lint checks are a good source. Check out the source code
as shown above and look in
lint/libs/lint-checks/src/main/java/com/android/tools/lint/checks/ or
browse sources online:
https://cs.android.com/android-studio/platform/tools/base/+/mirror-goog-studio-master-dev:lint/libs/lint-checks/src/main/java/com/android/tools/lint/checks/
Recent Changes
This chapter lists recent changes to lint that affect lint check authors: new features, API and behavior changes, and so on. For information about user visible changes to lint, see 7.0
android.experimental.useLintPartialAnalysis=true
to your gradle.properties file. If you want to debug your lint check
you may want to also set
android.experimental.runLintInProcess=true
Vendor property, where you
can specify information about which company or team provided this
lint check, which library it's associated with, contact information,
and so on. This will make it easier for users to figure out where to
send feedback or requests for 3rd party lint checks.
TestMode concept. You
can define setup and teardown methods, and lint will run unit tests
repeatedly for each test mode. There are a number of built-in test
modes already enabled; for example, all lint tests will run both in
global analysis mode and in partial analysis mode, and the results
compared to ensure they are the same.
Incident class which is used to hold information to
be reported to the user. Previously, there were a number of
overloaded methods to report issues, taking locations, error
messages, quick fixes, and so on. Each time we added another one we'd
have to add another overload. Now, you instead just report incidents.
This is critical to the new partial analysis architecture but is also
required if you for example want to override severities per incident
as described above.
This chapter lists the various environment variables and system properties that Lint will look at. None of these are really intended to be used or guaranteed to be supported in the future, but documenting what they are seems useful.
ANDROID_LINT_INCLUDE_LDPI Lint's icon checks normally ignore the ldpi density since it's not
commonly used any more, but you can turn this back on with this
environment variable set to true.
ANDROID_LINT_MAX_VIEW_COUNT Lint's TooManyViews check makes sure that a single layout does not
have more than 80 views. You can set this environment variable to a
different number to change the limit.
ANDROID_LINT_MAX_DEPTH Lint's TooManyViews check makes sure that a single layout does not
have a deeper layout hierarchy than 10 levels.You can set this
environment variable to a different number to change the limit.
ANDROID_LINT_NULLNESS_IGNORE_DEPRECATED Lint's UnknownNullness which flags any API element which is not
explicitly annotated with nullness annotations, normally skips
deprecated elements. Set this environment variable to true to include
these as well.
Corresponding system property: lint.nullness.ignore-deprecated
ANDROID_SDK_ROOTLocates the Android SDK root
ANDROID_HOME Locates the Android SDK root, if $ANDROID_SDK_ROOT has not been set
JAVA_HOMELocates the JDK when lint is analyzing JDK (not Android) projects
LINT_XML_ROOT Normally the search for lint.xml files proceeds upwards in the
directory hierarchy. In the Gradle integration, the search will stop
at the root Gradle project, but in other build systems, it can
continue up to the root directory. This environment variable sets a
path where the search should stop.
ANDROID_LINT_JARSA path of jar files (using the path separator — semicolon on Windows, colon elsewhere) for lint to load extra lint checks from
ANDROID_SDK_CACHE_DIR Sets the directory where lint should read and write its cache files.
Lint has a number of databases that it caches between invocations,
such as its binary representation of the SDK API database, used to
look up API levels quickly. In the Gradle integration of lint, this
cache directory is set to the root build/ directory, but elsewhere
the cache directory is located in a lint subfolder of the normal
Android tooling cache directory, such as ~/.android.
LINT_OVERRIDE_CONFIGURATION Path to a lint XML file which should override any local lint.xml
files closer to reported issues. This provides a way to globally
change configuration.
Corresponding system property: lint.configuration.override
LINT_DO_NOT_REUSE_UAST_ENV Set to true to enable a workaround (if affected) for
bug 159733104
until 7.0 is released.
Corresponding system property: lint.do.not.reuse.uast.env
LINT_API_DATABASE Point lint to an alternative API database XML file instead of the
normally used $SDK/platforms/android-?/data/api-versions.xml file.
LINT_PRINT_STACKTRACEIf set to true, lint will print the full stack traces of any internal exceptions encountered during analysis. This is useful for authors of lint checks, or for power users who can reproduce a bug and want to report it with more details.
Corresponding system property: lint.print-stacktrace
LINT_TEST_KOTLINC When writing a lint check unit test, when creating a compiled or
bytecode test file, lint can generate the .class file binary
content automatically if it is pointed to the kotlinc compiler.
LINT_TEST_JAVAC When writing a lint check unit test, when creating a compiled or
bytecode test file, lint can generate the .class file binary
content automatically if it is pointed to the javac compiler.
INCLUDE_EXPENSIVE_LINT_TESTS When working on lint itself, set this environment variable to true
some really, really expensive tests that we don't want run on the CI
server or by the rest of the development team.
./gradlew lintDebug -Dlint.baselines.continue=true
lint.baselines.continueWhen you configure a new baseline, lint normally fails the build after creating the baseline. You can set this system property to true to force lint to continue.
lint.autofix Turns on auto-fixing (applying safe quickfixes) by default. This is a
shortcut for invoking the lintFix targets or running the lint
command with --apply-suggestions.
lint.html.prefs This property allows you to customize lint's HTML reports. It
consists of a comma separated list of property assignments, e.g.
./gradlew :app:lintDebug -Dlint.html.prefs=theme=darcula,window=5
| Property | Explanation and Values | Default |
|---|---|---|
theme | light, darcula, solarized | light |
window | Number of lines around problem | 3 |
maxPerIssue. | Issue count before “More...” button | 50 |
underlineErrors | If true, wavy underlines, else highlight | true |
lint.unused-resources.exclude-tests | Whether the unused resource check should exclude test sources as referenced resources. |
lint.configuration.override | Alias for |
lint.print-stacktrace | Alias for |
lint.do.not.reuse.uast.env | Alias for |
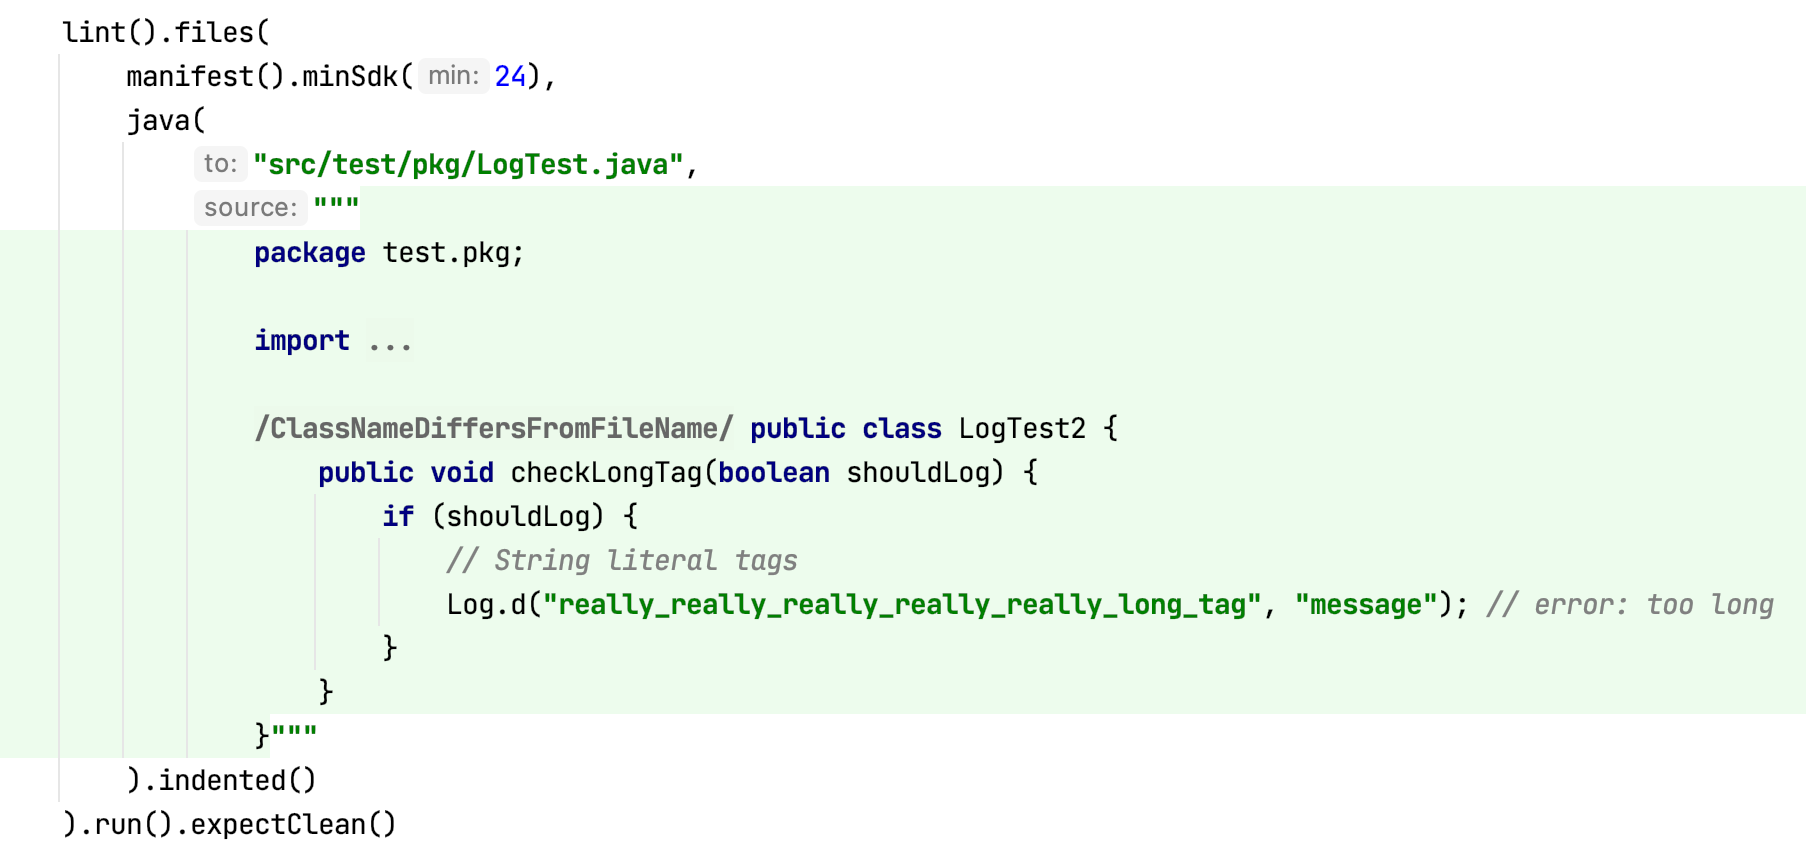